To prevent swimmer’s ear at home pools, you should maintain good water quality by regularly testing and balancing the pH, chlorine, and alkalinity levels. After swimming, dry your ears thoroughly using a gentle towel or a blow dryer on a low setting, and consider using drying drops with vinegar and alcohol. Wearing well-fitting earplugs and ensuring a safe, clean environment also helps. Keep these tips in mind to reduce your risk, and you’ll learn even more ways to protect your ears.
Key Takeaways
- Maintain proper pool water chemistry, including pH, chlorine, alkalinity, and calcium hardness, through regular testing and adjustments.
- Thoroughly dry ears after swimming using gentle methods like tilting, towel patting, or low-heat blow drying; consider drying drops with vinegar and alcohol.
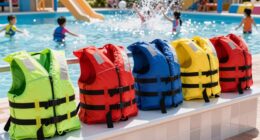
- Use well-fitting, water-resistant earplugs or swim caps to prevent water entry and reduce infection risk.
- Avoid inserting objects into the ear canal and prevent trauma by handling ears gently and avoiding excessive cleaning.
- Swim in well-maintained pools with proper disinfection, avoid stagnant water, and follow safety guidelines to minimize bacterial exposure.

Swimming Ear Plugs for Adults,3 Pairs Waterproof Reusable Silicone Swim Earplugs for Swimming Surfing Snorkeling Showering and Water Pool,Beach,Ocean (Adults & Teens 14+)
【Comfortable】Made of super soft silicon, it is comfortable and easy to wear. This lightweight silicone is contoured to…
As an affiliate, we earn on qualifying purchases.
As an affiliate, we earn on qualifying purchases.
Ensuring Proper Pool Water Chemistry

Have you checked your pool’s water chemistry recently? Maintaining the right balance is essential for swimmer comfort and safety. Keep your pH between 7.2 and 7.8, ideally around 7.4 to 7.6, to prevent eye and skin irritation and ensure effective disinfection. Regularly monitor chlorine levels, aiming for 1.0 to 3.0 ppm, to prevent bacterial growth and avoid skin or eye irritation. Ensure total alkalinity stays between 80 and 150 ppm; this buffers pH swings and protects your equipment. Check calcium hardness, keeping it between 200 and 400 ppm to prevent surface etching or scale buildup. Finally, maintain cyanuric acid levels between 30 and 50 ppm to shield your chlorine from UV degradation. Proper chemistry keeps your pool safe, clean, and comfortable. Monitoring chemical levels regularly ensures your pool remains balanced and safe for swimmers, while correct water chemistry helps prevent issues like swimmer’s ear.

Debrox Swimmer’s Ear Drops with Isopropyl Alcohol, Ear Drying Drops for Adults and Kids, 1 Fl Oz
#1 Swimmer’s Ear Brand*; Debrox Swimmer’s Ear Drops dries water-clogged ears after water activities *Source: IRI Circana, 2024
As an affiliate, we earn on qualifying purchases.
As an affiliate, we earn on qualifying purchases.
Regular Testing and Monitoring of Water Quality

You should test your pool water weekly to keep chemical levels balanced and prevent bacteria growth. Using reliable test strips makes it easier to monitor chlorine, pH, and alkalinity accurately. Maintaining proper levels helps protect swimmers’ ears and guarantees a safe swimming environment. Regular testing also allows you to detect potential issues early before they become serious problems. Additionally, understanding industry trends can help you stay informed about new testing methods and water quality standards.
Test Water Weekly
Regularly testing pool water is essential to guarantee safe swimming conditions and prevent swimmer’s ear caused by bacterial growth. You should test the water at least once a week, taking samples from about 12-18 inches below the surface, away from return jets and chemical dispensers. Circulate the water on high pump setting for at least an hour before testing to improve accuracy. Use proper sampling techniques and reliable testing tools like liquid reagent kits or digital photometers to measure key parameters such as free chlorine, pH, alkalinity, and stabilizer levels. Always follow testing instructions carefully, rinse equipment afterward, and store it properly. Testing store samples can be an effective alternative when in-home testing kits are unavailable. Monitoring weekly helps you catch rapid changes in water chemistry, ensuring the water remains safe, balanced, and less likely to foster bacteria that cause swimmer’s ear. Regular testing also helps prevent issues related to water quality decline, which can lead to bacterial growth and health risks.
Use Reliable Strips
Using reliable test strips is a convenient way to monitor your pool water’s quality quickly and easily. They provide quick snapshots of parameters like chlorine, pH, alkalinity, and hardness with clear color-coded indicators. Keep in mind, however, that test strips are less precise than test kits, and human error in reading colors can lead to inaccurate results. To ensure accuracy, collect water samples from at least 18 inches deep, avoiding surface testing alone. Proper storage in moisture-proof packaging preserves their effectiveness over time. Use strips designed for multiple parameters to save time, and replace them regularly to prevent degraded reagents. While test strips are accessible and affordable, combining their use with more precise methods can give you a better understanding of your pool’s water quality, helping prevent swimmer’s ear effectively. Regular testing improves water maintenance, ensuring safer swimming conditions. Additionally, understanding water quality parameters is essential for maintaining a healthy swimming environment.
Maintain Proper Levels
Consistently maintaining proper water levels requires diligent testing and monitoring to guarantee safe and healthy swimming conditions. You should collect water samples from 12-18 inches below the surface, avoiding near pool returns or floating dispensers, to get accurate results. Run the pool pump on high for at least an hour before testing to ensure proper circulation. Test water weekly during the swim season, and wait until chemicals are fully mixed before sampling. Regularly check free chlorine levels between 1-3 ppm, pH between 7.2 and 7.8, and total alkalinity from 80-120 ppm to keep water balanced. Use liquid reagent test kits for precise readings and record results consistently. Maintaining these levels prevents microbial growth and biofilms, reducing swimmer’s ear risk and promoting a safe swimming environment. Proper testing ensures water safety. Additionally, monitoring water chemistry helps maintain optimal water clarity and quality.
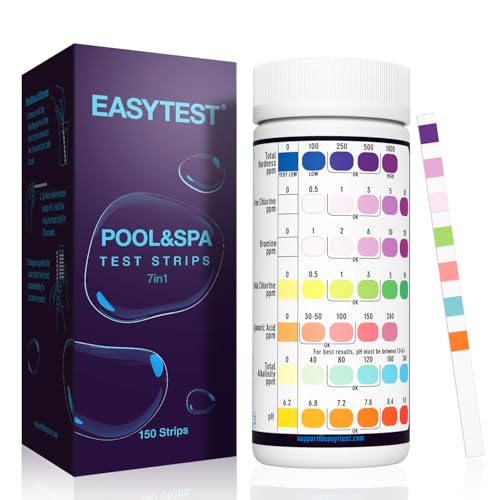
EASYTEST 7-Way Pool Test Strips, 150 Strips Water Chemical Testing for Hot tub and Spa, Accurate Test Bromine, Total Alkalinity, pH, Free Chlorine, Total Hardness, Cyanuric Acid, and Total Chlorine
AFFORDABLE 150 STRIPS: This water chemical testing kit contains 150 test strips. Enough balanced for your swimming pool,…
As an affiliate, we earn on qualifying purchases.
As an affiliate, we earn on qualifying purchases.
Effective Post-Swimming Ear Drying Techniques

After swimming, it’s important to dry your ears properly to prevent infection. Use gentle patting, tilt your head, and consider low heat from a blow dryer or drying drops to remove water effectively. Be cautious with your techniques and products to avoid irritation and guarantee your ears stay healthy. Creating a vacuum by cupping the ear with your palm and pushing back and forth can help draw water out. Ensuring proper data privacy during this process is essential to prevent any unintended exposure of personal information.
Proper Drying Methods
Proper drying techniques are essential to prevent swimmer’s ear by effectively eliminating trapped water in the ear canal. Start by tilting your head so the affected ear faces downward, allowing gravity to help drain water naturally. Gently pull or tug your earlobe downward and backward to straighten the ear canal, making water flow out more easily. You can also lie on your side with the affected ear down to encourage drainage. Avoid vigorous head shaking, as it might cause irritation or push water deeper. Afterward, use a soft, absorbent towel to pat the outer ear dry—never insert objects into the canal. Carefully dry around the ear and behind it, and consider using a blow dryer on the lowest heat and fan setting, holding it at least a foot away. Drying the ear thoroughly helps prevent moisture from lingering, which can lead to infection or swimmer’s ear. Additionally, maintaining proper ear hygiene can significantly reduce the risk of developing swimmer’s ear.
Use of Drying Drops
Have you considered using drying drops to effectively prevent swimmer’s ear? These drops typically combine equal parts white vinegar and 70% rubbing alcohol. Rubbing alcohol quickly evaporates trapped water, helping dry your ears, while vinegar creates an acidic environment that inhibits bacterial and fungal growth, reducing infection risk by up to 95%. To use, put 3-5 drops in each ear immediately after swimming, then wait about 30 seconds and gently massage the front of your ear. Tilt your head to drain excess fluid. Avoid drops if you have ear pain, discharge, or a perforated eardrum. Always consult a healthcare professional if you have ear issues. Proper use of drying drops, combined with physical drying methods, helps keep your ears dry and reduces swimmer’s ear chances. Using these drops correctly enhances your overall ear health and minimizes infection risk. Additionally, ensuring proper ear hygiene practices can further decrease the likelihood of developing swimmer’s ear.
Precautions After Swimming
Wondering how to effectively dry your ears once you’ve finished swimming? Tilt your head sideways with the affected ear facing downward to help water drain naturally. Gently pull your earlobe to straighten the ear canal, encouraging water to flow out. Repeat this side-to-side tilting for several minutes without forcing water deeper. For added drying, use a blow dryer on the lowest or cool setting, holding it at least 12 inches away, and move it slowly to avoid burns. Pat your outer ear with a soft towel to remove residual moisture, but don’t insert anything into the canal. You can also inhale warm steam from a shower or bowl of hot water, then tilt your head to drain water. Proper drying techniques can significantly reduce the risk of infection. Avoid inserting objects and allow your ears to dry naturally for ideal or best protection.
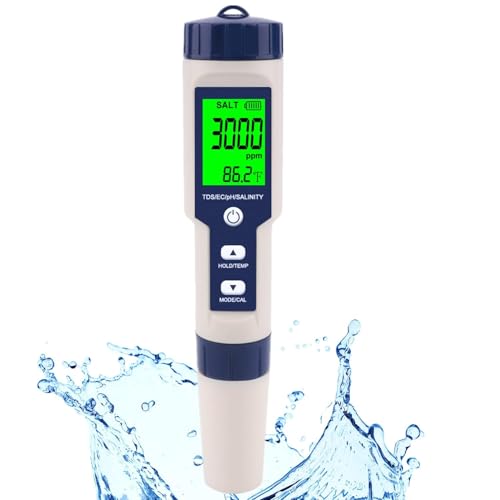
Pool Salt Tester & PH Meter, Hofun Digital Salinity Meter and PH Tester for Aquarium and Pool Saltwater Water, 5 in 1 Salinity PH Temp EC and TDS Meter, Aquarium Swimming Pool Hot Tub, High Accuracy
Wide Usage PH Meter : Hofun ph meter is an essential tool to improve your life quality. This…
As an affiliate, we earn on qualifying purchases.
As an affiliate, we earn on qualifying purchases.
Using Appropriate Ear Protection Devices

Choosing the right ear protection devices is essential for preventing swimmer’s ear and ensuring a comfortable swimming experience. Select earplugs made from silicone, acrylic, or wax, which mold well to fit your ear canal and resist water. Soft silicone earplugs, like Pillow Soft, are highly effective, while moldable silicone can be shaped for a perfect seal. Avoid foam earplugs, as they absorb water and trap bacteria, increasing infection risk. Some earplugs float, making retrieval easy if dropped. Proper fit creates a water-tight barrier, reducing water entry even during head movements. Here’s a comparison of common options:
| Material | Features | Best For |
|---|---|---|
| Silicone | Malleable, water-resistant | Custom fit, comfort |
| Acrylic | Firm, less flexible | Temporary use |
| Wax | Soft, adaptable | Sensitive ears |
| Foam | Absorbs water, not recommended | N/A |
| Floating | Easy recovery if dropped | Active swimmers |
Additionally, selecting the appropriate ear protection devices can also help prevent infections caused by water trapped in the ear canal.
Recognizing and Addressing Risk Factors

Prolonged and frequent water exposure markedly increases the risk of swimmer’s ear because moisture can accumulate in the ear canal, disrupting its natural defenses. If you spend a lot of time in water, especially in poorly maintained pools or natural bodies, bacteria like *Pseudomonas* or *Staphylococcus* can colonize more easily. Children aged 5 to 15 are particularly vulnerable due to smaller, narrower ear canals that trap moisture. Mechanical trauma from cotton swabs, earplugs, or excessive cleaning can damage skin, creating entry points for germs. Underlying conditions like eczema, diabetes, or narrow ear canals also heighten risk by impairing natural drainage and defense. Recognizing these factors helps you take proactive steps to minimize your chances of developing swimmer’s ear. Additionally, improper cleaning or injury to the ear can compromise the ear’s protective barrier, further increasing susceptibility. Being aware of ear canal anatomy can aid in understanding why certain individuals are more prone to infections and help guide safer practices.
Environmental Measures to Minimize Water Entry

Using physical barriers like properly fitted swim caps and high-quality earplugs is one of the most effective ways to prevent water from entering your ears during swimming. Choose swim caps that cover your ears completely and inspect them regularly for damage. Wear earplugs made of silicone or custom-molded materials designed specifically for swimming, and clean them with rubbing alcohol after each use. Guarantee earplugs fit snugly to prevent water leakage. Replace worn or damaged caps and plugs promptly to maintain a secure barrier. Additionally, swimming in well-maintained, chlorinated pools with proper pH and disinfectant levels reduces bacterial exposure. Avoid stagnant or murky water, and heed warning signs about unsafe conditions. These measures help minimize water entry and protect your ears from infection. Proper pool maintenance and water quality standards further decrease the risk of bacterial contamination and swimmer’s ear development. Paying attention to water pH levels can also help prevent irritation and infections in the ear canal.
Educating Family Members on Safe Swimming Practices

Supervision is the cornerstone of water safety for family members, especially young children. Drowning can happen silently and quickly, often when someone is momentarily left unsupervised. Even brief distractions, like answering a phone or grabbing a towel, can lead to tragedy. Assigning a dedicated Water Watcher during swimming sessions helps reduce risks markedly. Educate everyone about pool safety rules, such as no running or swimming alone, and ensure children understand the dangers of water. Teaching basic water skills and safety practices, like safe entry and recognizing hazards, builds confidence and awareness. Reinforcing emergency procedures, like “reach or throw, don’t go,” empowers family members to respond effectively. Clear communication and constant vigilance are essential to prevent accidents and keep everyone safe around your pool. Child drownings remain a significant risk, especially in residential pools, making vigilant supervision more critical than ever. Maintaining awareness of water safety protocols and proper supervision techniques can significantly reduce the risk of accidents.
Frequently Asked Questions
How Often Should I Replace My Pool’s Water to Prevent Bacteria Buildup?
You should replace your pool’s water every 5 to 7 years, but more frequent changes may be necessary if you notice persistent algae, cloudiness, or a strong odor. Regular chemical testing and maintenance help keep bacteria levels low, reducing the need for frequent full water changes. Keep an eye on your pool’s usage, weather, and cleanliness, and consult a professional if you suspect contamination or water quality issues.
Are There Natural Remedies for Ear Infections Caused by Swimming?
Yes, there are natural remedies for ear infections caused by swimming. You can try mixing equal parts of rubbing alcohol and white vinegar as ear drops after swimming to dry out the ear canal and inhibit bacteria. Keep your ears dry and avoid inserting objects like Q-tips. If symptoms persist or worsen, consult a healthcare provider, as some remedies might cause irritation or damage if misused.
Can Swimming in Indoor Pools Still Cause Swimmer’s Ear?
Yes, swimming in indoor pools can still cause swimmer’s ear. Water trapped in your ear canal creates an ideal environment for bacteria and fungi to grow, especially if you don’t dry your ears thoroughly afterward. Indoor pools may harbor germs if not well-maintained. To reduce your risk, use earplugs, dry your ears well, avoid inserting objects, and consider ear drops after swimming to keep your ears dry and protected.
What Signs Indicate an Early Stage of Swimmer’s Ear?
Can you tell if your ear’s starting to get infected? Early signs include pain when you move or pull on your outer ear, a feeling of fullness or clogging, and itchiness inside the canal. You might notice redness, swelling, or a clear fluid drainage. Sometimes, your ear feels muffled, and you could experience mild discomfort or slight hearing loss. If these symptoms appear after water exposure, it’s time to take action.
Is It Safe to Swim Immediately After Applying Drying Ear Drops?
No, it’s not safe to swim immediately after applying drying ear drops. You need to give the drops time to work and your ear to dry completely. Re-exposing your ear to water too soon can undo the drying process and increase infection risk. Wait at least several minutes, confirm your ear feels dry, and follow your healthcare provider’s advice before swimming again.
Conclusion
By staying vigilant and following these tips, you can keep swimmer’s ear at bay and enjoy your time at the pool. Regularly check water quality, dry your ears thoroughly, and use proper protection. Remember, even the most seasoned mermaid or merman needs to practice good habits to prevent discomfort or infection. Think of it as your personal scriptorium—carefully maintaining your health with intentional, proactive steps. Plunge in confidently, knowing you’re safeguarding your ears with wisdom and care.