
To stay safe, you should know standard lifeguard signals like raising both arms overhead for a missing swimmer, circular arm waves for distress, and raised fists for emergencies. Whistle blasts also communicate urgent situations, such as long blasts to clear the pool or short ones for warnings. Recognizing safety flags, zone markers, and visual cues helps you respond quickly. If you want to understand these signals and their importance better, there’s always more to learn.
Key Takeaways
- Recognize standard hand signals such as arms overhead for rescue and circular wave for distress.
- Understand water rescue signals like raising one arm toward the shore or pointing left/right.
- Know emergency signals including a raised fist or three short whistle blasts indicating urgent help needed.
- Be familiar with safety flag meanings, such as red flags for dangerous surf and yellow flags for moderate hazards.
- Use visual cues and whistles effectively to communicate with team members during emergencies.

Whistle, 3PCS Professional Emergency Whistles with Lanyards, Very Loud Pealess Whistle, Perfect for Lifeguard Rescue, Survival, Self-Defense
Sound power of 120+dB, to make sure you will be heard easily.
As an affiliate, we earn on qualifying purchases.
As an affiliate, we earn on qualifying purchases.
Understanding Beach Safety Flags and Their Meanings

Understanding beach safety flags is essential for staying safe while enjoying the water. These flags quickly communicate current conditions, helping you decide if it’s safe to swim. A green flag means calm surf and low hazard, so it’s generally safe. Yellow flags indicate moderate surf or currents, so caution is needed. One red flag warns of rough surf or strong currents; only strong swimmers should go in. Double red flags mean water is closed due to dangerous conditions. The red and yellow flag designates a lifeguard-supervised swimming zone, the safest area. Other flags, like black and white or purple, warn of specific hazards such as surfing restrictions or dangerous marine life. Recognizing these signals helps you respond appropriately and stay safe at the beach. Knowing how to interpret these flags can prevent accidents and ensure a safer experience in the water. Additionally, understanding prophetic dreams can sometimes offer personal insights or warnings, although their interpretations should be approached with caution.

Sirius Signal MK-1001 Boating Safety and Emergency SOS Kit – Complete Visual, Audible, and First Aid System – USCG Approved
All-In-One Safety Solution: A certified visual and audible distress signaling system combined with first aid, lighting, and tools…
As an affiliate, we earn on qualifying purchases.
As an affiliate, we earn on qualifying purchases.
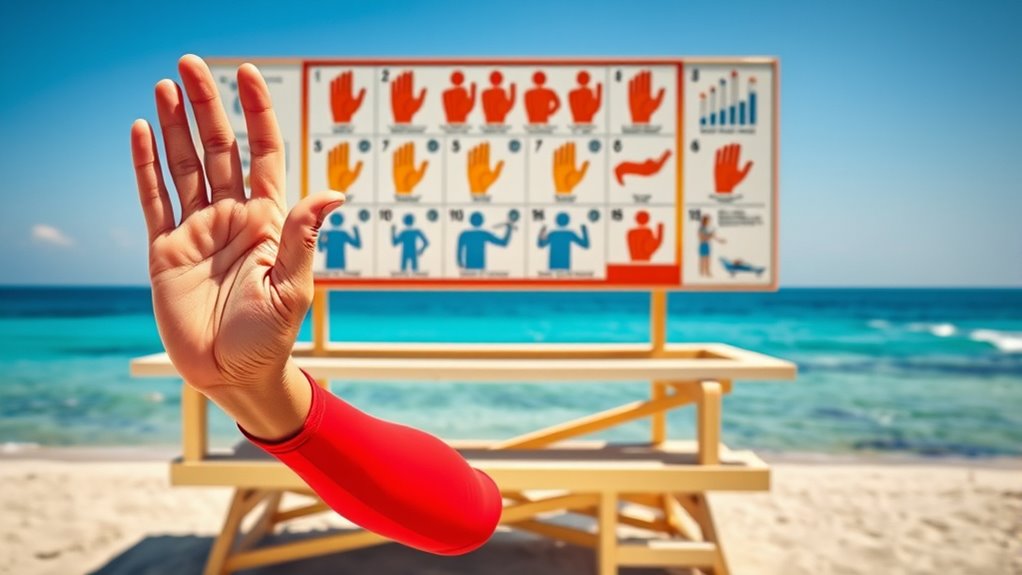
Recognizing Standard Lifeguard Hand Signals
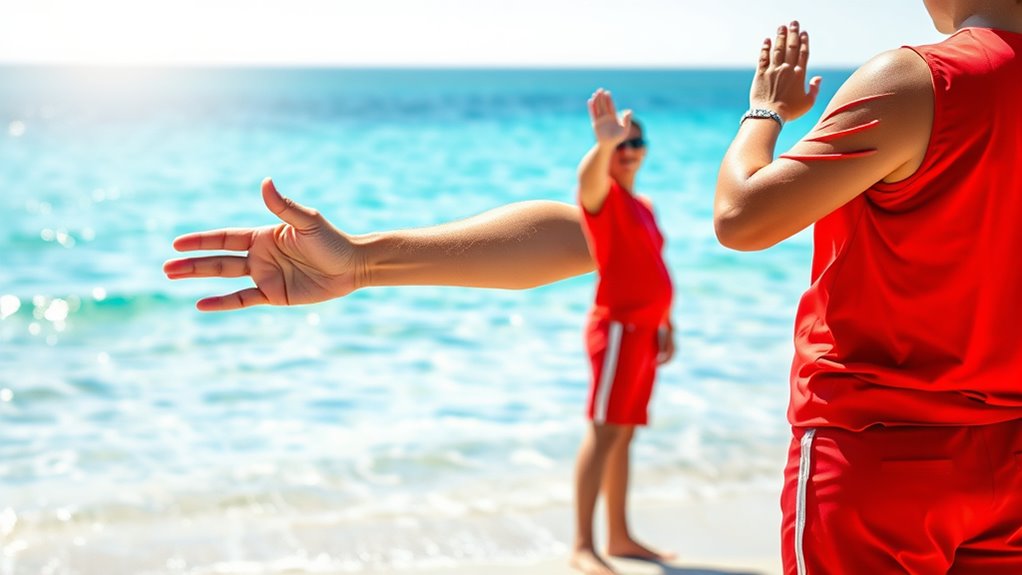
Recognizing standard lifeguard hand signals is essential for effective communication during emergencies. These signals help coordinate rescue efforts silently and quickly. For example, raising both arms to form a cross signals a swimmer is missing and presumed submerged, prompting immediate action. Waving one arm in a circle with the other parallel signals a swimmer needs rescue, catching attention swiftly. Touching the middle of the head with fingertips indicates the patient is stable and no extra help is needed but monitoring continues. Repeat signals until acknowledged to confirm understanding. Here’s a quick reference:
| Signal | Meaning | Action |
|---|---|---|
| Both arms overhead | Missing swimmer | Search & rescue |
| Circular arm wave | Distress signal | Rescue needed |
| Touch head | Stable patient | Monitor |
Master these to ensure clear, silent communication during emergencies.
ACR HemiLight3 HL3 Automatic Survivor Locator Light, Med, Solas, and USCGC Approved, Ensures Reliable, Automatic Distress Signaling for Swift Rescue in Emergencies.
The Auto HemiLight flashing survival light easily attaches to most life jackets, offering quick installation and reliable automatic…
As an affiliate, we earn on qualifying purchases.
As an affiliate, we earn on qualifying purchases.
Signaling Emergency Situations Effectively

Signaling emergency situations effectively requires that lifeguards recognize urgent whistle patterns immediately. Using clear and consistent communication methods guarantees everyone understands the situation quickly. Practicing these signals regularly helps you respond swiftly and prevent confusion during real emergencies. Additionally, establishing a standardized set of signals among team members ensures coordinated efforts and quick action when every second counts. Incorporating visual cues like hand signals or specialized equipment can further enhance clarity during complex situations.
Recognizing Urgent Signals
In emergency situations, clear and immediate communication is essential for ensuring everyone’s safety. Recognizing urgent signals quickly helps you respond effectively. A three short whistle blasts mean a life-threatening situation requiring immediate action. A continuous whistle blast signals danger like lightning, prompting an evacuation. Two short blasts may alert fellow lifeguards to an emergency, though protocols vary. A long blast often instructs everyone to clear the pool during evacuations. Visually, raising both arms in a cross indicates a swimmer is missing and needs rescue. An open hand raised tells swimmers to stop, while a circular arm wave directs rescuers to a distressed swimmer. Recognizing these signals promptly allows you to activate emergency protocols swiftly, ensuring safety for all. Additionally, understanding the importance of safety protocols and proper signaling techniques enhances overall response effectiveness.
Clear Communication Methods
Clear communication during emergencies is essential for ensuring everyone’s safety and coordinating effective rescue efforts. Using standardized signals helps prevent misunderstandings and speeds up response times. Here are key methods to communicate clearly:
- Hand signals: A raised fist signals distress, while an open hand directs swimmers to stop. Waving an arm in circles alerts lifeguards to a rescue need, and directional signals guide team positioning.
- Whistle commands: One long blast starts surveillance, and three short blasts signal a life-threatening emergency. Continuous blasts indicate dangerous weather, prompting evacuation.
- Combined signals: Using whistles alongside hand signals ensures clarity in noisy environments and helps coordinate rescue efforts efficiently. Regular training keeps these methods sharp and effective. Incorporating digital communication tools can further enhance coordination during large or complex emergencies.

12pcs Classroom Hand Signals Poster, Waterproof Classroom Visual Cue Cards Hand Gestures Classroom Nonverbally Communicate Supply Decoration for School Kindergarten
Product Included: You will receive 12 pieces of classroom hand signals poster with 40 pieces of adhesive dots…
As an affiliate, we earn on qualifying purchases.
As an affiliate, we earn on qualifying purchases.
Communicating During Rescue Operations
During rescue operations, clear visual communication is essential to coordinate effectively and make certain safety. You rely on standardized hand signals and emergency signals that everyone recognizes instantly, reducing confusion. Mastering these signals helps you respond quickly and keep your team on the same page in high-pressure situations. Effective communication not only enhances safety but also ensures that rescue efforts are swift and well-coordinated, especially when electronic devices fail in saltwater environments. Utilizing visual signals can significantly improve response times and minimize misunderstandings during critical moments.
Clear Visual Communication
Effective visual communication is essential for coordinating rescue efforts swiftly and accurately. It helps you relay critical information without delay, especially in noisy or crowded environments. Here are key methods to guarantee clear visual communication:
1. Use digital drowning detection systems like SwimEye to monitor underwater activity and identify potential dangers early. Combining Human Observation and Technology enhances your ability to detect issues before they escalate. Incorporating early warning alarms, such as color changes from green to yellow, can alert you to emerging threats up to 15 seconds before full alarms sound. This proactive approach allows for timely interventions. 2. Rely on early warning alarms, such as color changes from green to yellow, to recognize emerging threats up to 15 seconds before full alarms sound.
3. Employ portable radios to share real-time information instantly among team members, streamlining your response.
Standardized Hand Signals
Standardized hand signals provide an essential means of communication among lifeguards during rescue operations, especially when verbal cues are impractical. These signals are developed by organizations like the ILSF and SLSA to guarantee clear, uniform communication. You must perform each signal distinctly and repeat it until acknowledged by others. For example, raising both arms to form a cross indicates a missing swimmer, prompting an immediate search. Waving one arm in a circular motion signals a swimmer in need of rescue, guiding responders to the victim. Holding two arms vertically signals moving further out, while one arm indicates moving toward the shore. Directional signals, like pointing left or right, direct rescuers precisely. Always perform signals clearly and wait for acknowledgment, ensuring swift, effective responses during emergencies. Performing these signals correctly is crucial for safety and helps prevent miscommunication during critical moments. Understanding rescue signaling protocols ensures all team members respond efficiently and cohesively in emergency situations.
Emergency Signal Recognition
How do lifeguards communicate quickly and clearly in high-stress rescue situations when verbal cues might fail? Emergency signals are crucial—they ensure rapid, unambiguous communication. These signals alert all staff to critical scenarios like submerged victims, multiple rescues, or sudden hazards, prompting immediate action. Recognized internationally, they prevent confusion across teams and borders. To understand their importance, focus on these key signals:
- Raised Fist – signals a serious emergency needing immediate attention.
- Three Short Whistle Blasts – indicates a life-threatening situation or urgent assistance.
- Both Arms Crossed Above Head – signifies a missing swimmer presumed submerged, initiating search protocols. Clear emergency signal recognition is essential for effective rescue operations.
Recognizing and responding to these signals instantly can save lives, making clear communication indispensable in every rescue.
Interpreting Watercraft and Zone Marking Flags
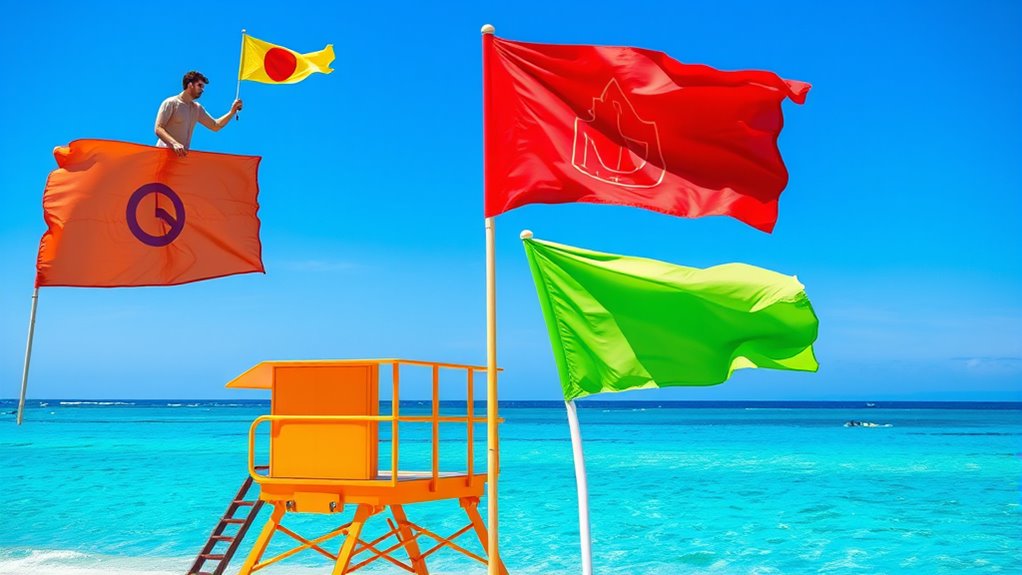
Interpreting watercraft and zone marking flags is essential for staying safe at the beach. Red and yellow flags mark lifeguard-protected zones, indicating safe swimming areas supervised by lifeguards. Stay within these flags to avoid hazards and ensure safety. Black and white quartered flags designate watercraft zones, where swimming is prohibited to prevent collisions; stay clear of these areas. Yellow flags warn of medium hazard conditions like rip currents and stronger waves; exercise caution or avoid swimming if you’re inexperienced. Purple flags signal the presence of dangerous marine life such as jellyfish or stingrays—swim at your own risk. Additional flags like yellow with a black ball mark zones where watercraft are restricted, and orange windsocks warn of offshore winds. Recognizing these flags helps you stay aware and safe in the water. Understanding the different flag signals can significantly improve your safety and navigation while at the beach. Being familiar with watercraft regulations and the specific meanings of each flag can further enhance your safety and awareness.
Signs of Marine Pests and Hazard Warnings
When you see a purple flag, it signals the presence of marine pests like jellyfish or harmful algae, so you should be extra cautious. These signs warn of potential dangers, including dangerous jellyfish stings or poor water quality. Always check with lifeguards before entering the water when these warnings are in place. In addition, being aware of toxic marine species can help you better understand the risks associated with certain water conditions.
Purple Flag Indicators
Ever wondered what a purple flag at the beach really signals? It warns you about dangerous marine life like jellyfish, stingrays, or other hazardous ocean animals. When you see one, stay alert and exercise caution. Here are key indicators:
- Presence of jellyfish, stingrays, or hazardous species in the water
- Sightings of marine pests or signs of recent stings or bites
- Local alerts about specific marine animal activity or toxicity
- Marine laboratory reports or official notices indicating increased marine life activity or dangerous species in the area. These reports often include information about marine species behavior and potential risks to swimmers.
A purple flag doesn’t always mean the water is closed, but it’s a clear signal to avoid swimming or wading. These flags alert you to increased risks, so follow lifeguard instructions, exit the water if you see marine pests, and stay safe. When in doubt, ask a lifeguard for guidance.
Marine Pest Signage
Marine pest signage plays a vital role in warning beachgoers about the presence of potentially dangerous marine life and hazardous water conditions. When you see purple flags, they signal the presence of marine pests like jellyfish, stingrays, sea snakes, or harmful algae. These pests can cause injuries ranging from minor stings to life-threatening reactions, so caution is essential. Unlike sharks, which are indicated by a red and white quartered flag, purple flags focus on other hazards. Always consult with lifeguards before entering the water during purple flag conditions. They can advise you on specific risks and safe areas. Pay attention to signage and flag updates, as marine pest presence can change rapidly. Staying informed helps you avoid injuries and enjoy the water safely. Knowledge of regional hazards helps you respond appropriately in different areas. Being aware of food safety practices can also prevent accidental injuries when handling raw marine life or other water-related hazards.
Recognizing Restricted and Mandatory Safety Signs
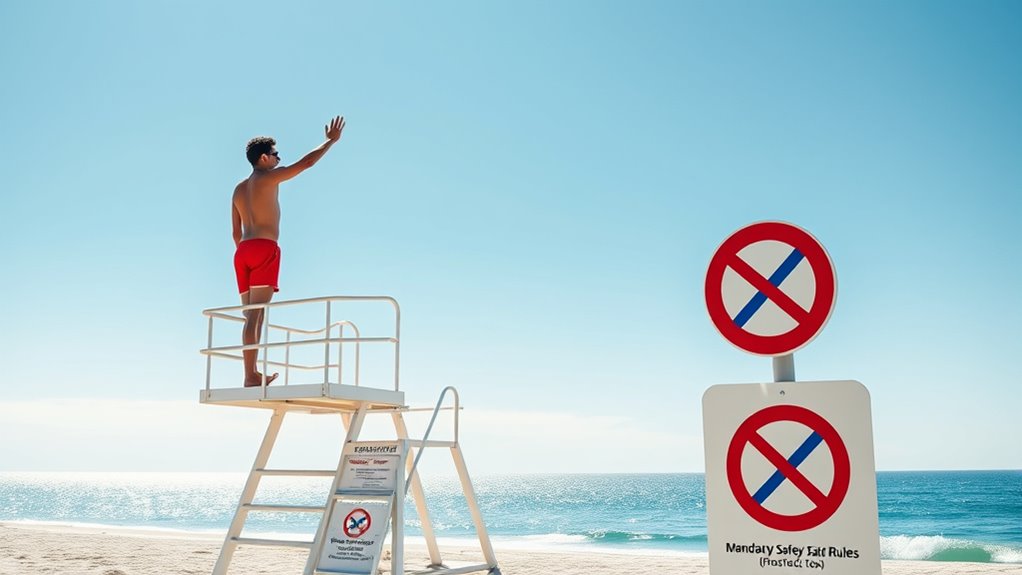
Are you able to quickly identify restricted and mandatory safety signs at pools and beaches? Recognizing these signs is essential for your safety and compliance. Here are three key signs to watch for:
Quickly identify safety signs at pools and beaches to stay safe and compliant.
- Restricted Area Signs — Indicate zones where entry is forbidden or limited, like “No Diving,” especially in shallow water under 5 feet, or “Keep Gate Closed” at pool entrances. Signage must be clearly visible and in a location that is easily seen by all visitors. Proper placement helps prevent accidents and ensures that everyone is aware of potential hazards, including sign visibility considerations.
- Mandatory Safety Signs — Show actions you must follow, such as “Children Should Not Use Pool Without Adult Supervision” or “Emergency Phone Location.”
- Sign Placement and Visibility — Signs are placed on walls, gates, or high-traffic areas, with large, contrasting letters (at least 4 inches high) for easy reading. Ensuring signs are visible and legible is crucial for communication and safety compliance.
Using Visual Signals for Coordination and Safety

Using visual signals is essential for effective communication and safety during lifeguard operations, especially in noisy environments or when swimmers are submerged. You rely on hand gestures, eye contact, and equipment like whistles to coordinate with fellow lifeguards and direct patrons. Clear signals, such as a raised hand to ask patrons to wait or a sweeping motion to warn of hazards, help prevent accidents. When communicating with other lifeguards, signals like a straight arm pointing or circular motions indicate shifts or emergencies. International standards provide specific signs, like raising both arms to signal a submerged swimmer or pointing to direct rescue efforts. Consistent use of these signals ensures quick, precise responses, maintaining safety and operational efficiency across all situations. Proper training on exfoliation benefits can enhance your understanding of how to respond effectively in emergencies involving skin or scalp conditions.
The Importance of Consistent Signal Training
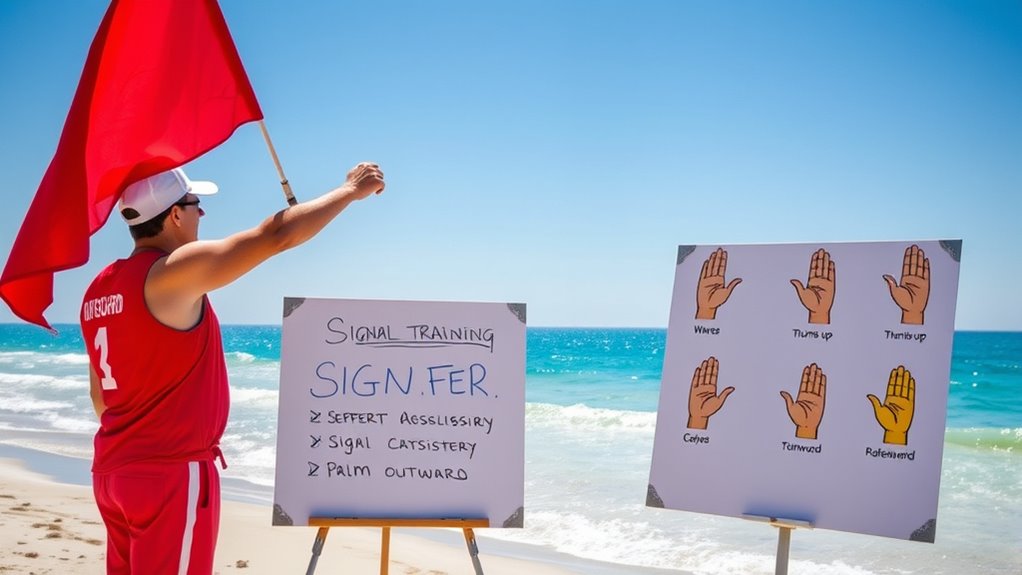
Consistent signal training is essential for ensuring clear communication among lifeguards during emergencies. When everyone understands the same signals, you can respond faster and coordinate more effectively. Without standardization, confusion may arise, causing delays or mistakes. Here are three reasons why consistent training matters: 1. Reduces misunderstandings — uniform signals prevent misinterpretation during high-stress situations. 2. Facilitates teamwork — synchronized training helps lifeguards work seamlessly across different facilities. 3. Enhances safety — clear, standardized signals minimize errors that could escalate incidents. Eye-tracking studies have shown that well-practiced signals improve attentional focus and response accuracy during complex scenarios, especially when understanding environmental cues.
Tips for Clear and Accurate Signal Execution
Clear and accurate signal execution relies on making every gesture simple, deliberate, and easily visible. Keep signals minimal and distinct to prevent confusion—often, a straightforward pointing or a single arm movement works best. Execute gestures with full extension and deliberate pacing, ensuring they are visible from a distance and in different weather conditions. Use high-contrast hand positions, such as arms raised against the sky, to enhance recognition. Confirm receipt of signals through eye contact, head taps, or mirroring gestures, and respond promptly with acknowledgments. Avoid complex or multiple signals at once; instead, focus on one clear message per gesture. Regular training helps develop muscle memory, while consistent team coordination ensures everyone understands and responds accurately to signals in any situation. Continuous scanning from the lifeguard stand is essential to recognize signs of danger early and communicate effectively with team members. Additionally, understanding security measures can help protect the safety of both swimmers and staff, ensuring a secure environment for all.
Frequently Asked Questions
How Do I Interpret Mixed Flag Signals at the Beach?
When you see mixed flag signals at the beach, you need to stay alert and assess the combined meanings. Check all flags carefully, as they might warn of multiple hazards like dangerous marine life, rough surf, or watercraft zones. Always ask a lifeguard if you’re unsure, and avoid swimming in areas marked with black and white flags. Your safety depends on understanding these signals and responding promptly and cautiously.
What Are the Most Common Mistakes in Using Lifeguard Hand Signals?
Imagine yourself in a busy, noisy beach scene, hands raised for a signal. The most common mistakes you make include inconsistent or unclear signals, which can confuse your team. You might delay or forget to repeat critical signals, or use gestures that look similar, leading to misinterpretation. Poor visibility, environmental distractions, or inadequate training also cause errors. Staying consistent, clear, and well-practiced helps prevent these mistakes and keeps everyone safe.
How Can I Distinguish Between Warning and Prohibition Signs Quickly?
To distinguish warning from prohibition signs quickly, look at their colors and symbols. Warning signs usually have yellow flags or signals, indicating caution, with no symbols or simple shapes like triangles. Prohibition signs feature red flags, often with symbols like crossed-out swimmers or watercraft, signaling activities are not allowed. Remember, red flags mean no swimming or entry, while yellow flags warn you to be cautious but permitted to proceed.
What Steps Should I Take if a Signal Is Unclear or Ambiguous?
If a signal is unclear or ambiguous, repeat it clearly until the other lifeguard confirms understanding. Use universal hand signals, supplemented with whistle blasts or verbal commands for clarification. Avoid assumptions—seek confirmation through return signals. If confusion persists, stay vigilant, monitor the swimmer, and communicate with your team. Use alternative methods like radios or flags if needed, and document recurring issues to improve training and prevent future misunderstandings.
Are There Specific Signals for Different Types of Water Emergencies?
Did you know that over 80% of drowning incidents involve a single victim? Yes, there are specific signals for different emergencies. For example, crossing arms above the head signals a presumed submerged swimmer, while waving one arm in a circle indicates someone needs rescue. Touching the head shows no help is needed, and vertical arms direct movement. Recognizing these signals helps you respond swiftly to varying water emergencies.
Conclusion
By learning these lifeguard signals, you’re not just staying safe—you’re also part of a bigger safety network. Sometimes, a simple hand gesture or flag can prevent a mishap or save a life, especially when you least expect it. Keep practicing these signals, stay alert, and trust your training. After all, the right signal at the right moment might be the coincidence that makes all the difference in an emergency.