Start by turning off the pool power and relieving pressure before disassembling your filter. Carefully loosen the housing clamps, remove the canister, and gently take out the cartridges. Rinse the cartridges with a garden hose, rotating them to guarantee thorough cleaning. For deep cleaning, soak the cartridges in a cleaning solution, then rinse again. Reassemble the filter, restart the system, and monitor pressure and flow. Follow these steps closely to keep your filter running smoothly. For detailed tips, keep exploring this guide.
Key Takeaways
- Turn off the pool system, disable controls, and relieve pressure before opening the filter housing.
- Carefully unscrew the housing cap, remove the cartridge, and handle it gently to prevent damage.
- Rinse the cartridge thoroughly with a garden hose at a 45° angle, rotating for even cleaning until water runs clear.
- Inspect the cartridge and seals for tears, debris, or damage; clean and replace seals if necessary.
- Reassemble the housing securely, check for leaks, and restart the system, monitoring pressure and flow for proper operation.

SWIMLINE HYDROTOOLS Complete Sand Filter System, 14" Tank - for Above-Ground & Inground Pools Up to 10,500 Gallons, Single Speed Pump, 0.45 THP, 2,400 GPH, 4-Way Multi-Port Valve, 60 lb Capacity
Optimized Filtration: Swim in crystal-clear pool waters with Swimline HydroTools sand filters, designed for optimized filtration efficiency and...
As an affiliate, we earn on qualifying purchases.
Preparing for Safe Disassembly

Before disassembling your cartridge filter, it is essential to prioritize safety. First, turn off the power to your pool system to prevent accidental startup. Disable automatic controls to avoid unintentional pump activation. Never open the filter while the pump is running, as this can be dangerous. Remember, the filter is a pressure vessel, and opening it under pressure could cause injury. Always follow the manufacturer’s warnings and instructions for safe servicing. Next, relieve pressure by opening the manual air relief valve and standing clear until the gauge reads zero. If available, open the waste drain valve or plug for extra pressure release. Taking these steps guarantees your safety before proceeding with the disassembly process.
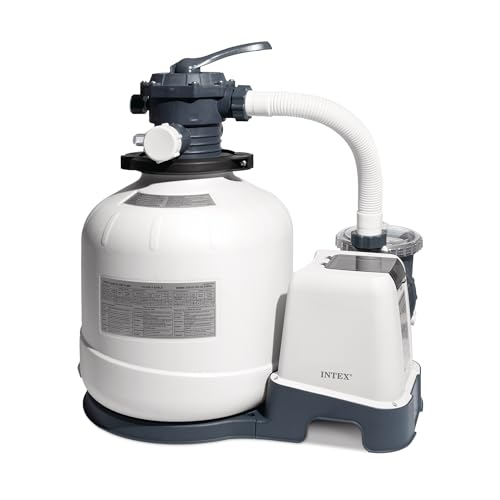
INTEX 3,000 GPH Krystal Clear Sand Filter Pump for Above Ground Pools, Swimming Pool Pump with Automatic Timer - Improved Circulation, Filtration, & Clarity
✔ EXCELLENT FILTRATION – SX3000 provides excellent water filtration with the 6-function valve that allows you to filter,...
As an affiliate, we earn on qualifying purchases.
Carefully Removing the Filter Components

When removing filter components, you need to do so carefully to prevent damage. Start by loosening the housing clamps gradually, using the right tools, and ensuring system pressure is fully relieved. Then, lift and handle the filter cartridges gently to avoid tearing or bending, and inspect all parts for wear or damage. Ensure all pressure is released from the system and filter tank before disassembly to prevent injury or component damage. Additionally, understanding Mazda Tuning principles can help you recognize the importance of proper handling to preserve vehicle performance.
Safely Disassembling Housing
To safely disassemble the housing, start by ensuring the system is fully depressurized and the water supply is shut off. Release any residual pressure using the pressure relief button, if available. Place a bucket or container beneath the housing to catch remaining water. Confirm all valves are closed before beginning. Unscrew the filter housing cap by turning it counterclockwise; use a wrench if it’s stuck. If needed, gently heat the outside with a blow dryer to expand the plastic. For stubborn housings, leverage with two wrenches or a strap wrench. Carefully remove the cap, avoiding damage to the threads or housing. Keep the housing upright to prevent debris entry. Once disassembled, set the components aside in a clean area, ready for cleaning or replacement. Applying proper technique and tools, including correct disassembly methods, is essential to prevent damage or injury during removal.
Handling Filter Cartridges Carefully
Handling filter cartridges with care is essential to maintain their effectiveness and prevent damage or contamination. You should prepare your work area with absorbent materials to catch any water spills. Before removing the cartridge, ensure the water flow is fully stopped by closing shut-off valves or using alternative methods. Release any built-up pressure with pressure-release mechanisms if available to avoid sudden water discharges. Have proper tools, such as a plastic filter wrench, ready to gently unscrew or lift components without forcing them. Keep an open downstream faucet to drain residual water, making removal easier and cleaner. Proper handling reduces the risk of introducing contaminants into the system. – Use the correct tools to avoid damaging the housing. – Handle cartridges gently to prevent cracks or leaks. – Note the orientation before removal for proper reinstallation. – Inspect for damage or wear immediately after removal. Additionally, being aware of filter technology can help you better understand how to care for and replace cartridges effectively.

HOUSOUTION Salt Water Pool Chlorinator System, Salt Chlorine Generator with Smart App Control, Saltwater Pool System, Chlorinator for Inground Pool, Salt Cell for Pool, Up to 40,000 Gallon Pool
【Brand New Design】Revolutionary compact design allows this salt water pool chlorinator system incredibly easy DIY installation
As an affiliate, we earn on qualifying purchases.
Rinsing and Removing Loose Debris

Before rinsing your cartridge filter, make sure the pool pump is turned off and the filter pressure has been fully released using the air relief valve. Carefully remove the filter housing cover to access the cartridges, lifting them out gently to avoid damage. Use a garden hose with a spray nozzle to rinse the cartridges from top to bottom, angling the hose at about 45 degrees for effective debris removal. Rotate the cartridges while rinsing to clean all surfaces evenly, focusing on pleats and folds where dirt tends to accumulate. Continue until the water runs clear and no visible debris remains. Inspect the cartridges for cracks or tears, and wipe the O-rings and housing clean. Air dry the cartridges before reinstallation or proceed to deeper cleaning if needed. Incorporating energy monitoring features can help you track your pool equipment’s efficiency and potentially reduce energy consumption.

Bonvoisin Salt Water Pool Chlorinator System Salt Chlorine Generator for Inground Pools Saltwater Pool System with Titanium Cell, LED Control Panel, Self-Cleaning Function Up to 22,400 Gallons Pool
Self-Cleaning Function: The chlorination system features a self-cleaning function, which can be set to reverse polarity every 4,...
As an affiliate, we earn on qualifying purchases.
Deep Cleaning and Soaking the Cartridges

Deep cleaning and soaking your cartridge filters thoroughly remove stubborn mineral deposits, oils, and organic residues that rinsing alone can’t eliminate. By immersing your filters in the right solution for the appropriate duration, you improve filtration efficiency and extend their lifespan. Use a variety of solutions depending on your needs: a 1:1 water-vinegar mix overnight for organic buildup, a 1:20 muriatic acid soak for minerals, or TSP or commercial cleaners for oils and biofilms. Guarantee the cartridges are fully submerged and soak long enough to break down contaminants. If residues persist, repeat the process. Limit acid soaks to about an hour and rinse thoroughly afterward to prevent damage. Proper soaking and solution choice restore water flow and help keep your filter system running smoothly. Regular cartridge maintenance enhances performance and prevents costly replacements.
Final Rinsing and Reassembly Procedures

As you reassemble the cartridge filter, pay close attention to the O-rings to guarantee they’re properly handled and seated. A damaged or improperly installed seal can cause leaks and compromise filtration. Double-check the seal integrity before moving on to avoid issues during operation. Properly inspecting and replacing worn or damaged O-rings ensures the filter maintains its effectiveness and prevents contamination or system failure. Maintaining privacy and boundaries in your relationship can also help reduce stress and promote a focused environment for your household.
Proper O-ring Handling
Proper O-ring handling is essential to guarantee a tight seal and prevent leaks during reassembly. You need to verify the O-ring is clean, undamaged, and correctly seated. After rinsing, inspect the O-ring for cracks, tears, or wear, and clean it with a damp cloth to remove dirt or residue. Check for twisting or misalignment before placing it back into the groove. Apply a thin layer of silicone-based lubricant to facilitate smooth seating and prevent damage. When positioning the O-ring, make sure it’s not pinched or twisted. During reassembly, confirm the O-ring remains properly seated and visible. Double-check for leaks, misalignment, or gaps. Proper handling minimizes the risk of seal failure and ensures your filter operates efficiently. Additionally, filter maintenance is crucial for optimal air purifier performance and longevity.
Ensuring Seal Integrity
After handling the O-rings correctly, focus on final rinsing and reassembly to maintain seal integrity. Use filtered water for the final rinse—start with cold, then warm water at 50 ± 5°C (113–131°F)—to remove soluble particles. Keep the flow rate at or above the process flow to ensure effective cleaning. Rinse until the effluent is clear and free of residue, monitoring pressure and temperature gauges throughout. When inspecting the filter media, look for debris, discoloration, tears, or fouling, and document any defects. During reassembly, ensure all components are dry and properly seated, then check for leaks by filling the housing with water. Confirm seals are intact and monitor pressure during initial operation to sustain seal integrity. Proper seal maintenance is essential to prevent leaks and ensure long-term filter performance.
Restarting the System and Monitoring Performance

Wondering how to guarantee your cartridge filter system restarts safely and performs at its best? First, confirm the system is fully depressurized before reassembling. Close the air relief valve completely to prevent air lock. When restarting the pump, monitor for smooth operation, listening for unusual noises or leaks. Check the pressure gauge to confirm it’s within the normal range and aligned with the clean filter arrow. Reset automated controls and timers to resume normal operation. After restart, watch for pressure spikes or drops, which might signal improper assembly or trapped air. Regularly check the water chemistry and flow rate to ensure optimal system performance.
- Regularly check the pressure gauge for early clog signs
- Inspect O-rings, lock rings, and clamps for wear or damage
- Observe water clarity and flow rate for potential issues
- Record pressure readings and noises for trend analysis
Ongoing Maintenance for Optimal Filter Function

To guarantee your filter system functions at its best, regular maintenance is essential. Start by inspecting the filter visually each month for tears, clogs, or damage, and check the integrity of pleats and end caps. Record your findings to monitor the filter’s condition over time. Keep an eye on the pressure gauge weekly; clean the filter when pressure rises 8–10 PSI above the baseline. Flushing debris from the housing monthly helps prevent clogging and extends filter life. Adjust cleaning frequency based on your environment—more often in high-debris areas, less in cleaner conditions. Use approved cleaning solutions and avoid harsh chemicals. Rinse thoroughly and air dry before reinstalling. Consistent maintenance guarantees ideal performance and longevity of your cartridge filter.
Frequently Asked Questions
How Often Should I Clean My Cartridge Filter?
You should clean your cartridge filter every two weeks during peak swimming season, especially if your pool gets heavy use or debris. During off-season or less frequent use, once a month usually suffices. Keep an eye on pressure gauges—if pressure rises 8-10 PSI above normal, it’s time to clean. After heavy rain, storms, or algae blooms, clean immediately to maintain water clarity and filter efficiency.
Can I Use Bleach to Clean the Cartridges?
Using bleach on your cartridge filter is like pouring acid into a delicate clockwork—it can cause damage. Most manufacturers and experts advise against it because bleach can degrade the filter media, leaving residues that contaminate your pool and irritate swimmers’ skin. Instead, opt for safer alternatives like vinegar, commercial cleaners, or pressure rinsing. These methods clean effectively without risking your filter’s lifespan or your pool’s water quality.
What Signs Indicate My Filter Needs Replacement?
You’ll know your filter needs replacing when you notice reduced flow rate or increased pressure, indicating clogging. Discolored or cloudy water, sediment buildup, or strange smells also suggest saturation or failure. Visible damage like tears, cracks, or worn fabric means it’s time for a new filter. Additionally, if performance declines despite cleaning, or if the filter has been in use over 12-18 months, replacing it guarantees maximum filtration.
Is It Necessary to Replace O-Rings During Cleaning?
You don’t always need to replace O-rings during cleaning, but you should inspect them carefully every time. If you notice cracks, tears, flattening, or brittleness, replace them immediately to prevent leaks and system failure. Properly cleaning, lubricating, and handling the O-ring helps extend its lifespan. Remember, if the O-ring shows signs of wear or if there’s persistent leakage after reassembly, it’s best to replace it to maintain ideal filter performance.
How Do I Prevent Mold Growth on Filters?
Think of your filter system like a garden; neglect makes it a breeding ground for mold. To prevent mold growth, you should regularly clean and dry filters thoroughly, especially after periods of inactivity. Keep the filter housing free of moisture, install filters in dry, well-ventilated areas, and consider antimicrobial treatments. Using dehumidifiers and periodically flushing the system also help keep mold at bay.
Conclusion
Think of cleaning your cartridge filter like tending a garden—you need regular care to keep things thriving. I once ignored mine, and clogs caused a system shutdown. After cleaning it properly, performance improved dramatically, just like a garden blossoming again. Consistent maintenance isn’t just about avoiding trouble; it’s about nurturing your system to run smoothly and efficiently. Stay vigilant, and your filter will serve you well, keeping everything flowing seamlessly.