
TL;DR
Moving your rig into a closet can drastically reduce noise and improve acoustics — if you vent it properly and treat reflections. Foam isn’t enough; focus on placement, sealing gaps, and managing heat for a great, quiet setup.
Ever tried recording in a tiny closet? It’s like squeezing a concert hall into a shoebox. You get a warm, focused sound, but also a lot of reflections and ambient noise. The secret isn’t just in slapping up foam — it’s about where you put your gear, how you treat the space, and managing heat. This guide clears up the confusion between acoustic dampening and soundproofing, and shows you how to turn a small closet into a quiet, professional-sounding booth.
If you’re tired of noisy rigs ruining your recordings or just want a simple, budget-friendly solution, you’re not alone. Many creators lean on closet setups because they’re cheap, fast, and surprisingly effective. But without proper placement and ventilation, your efforts can backfire — turning your cozy space into a hot, echoey mess. Let’s explore how to do this right.
Acoustic dampening
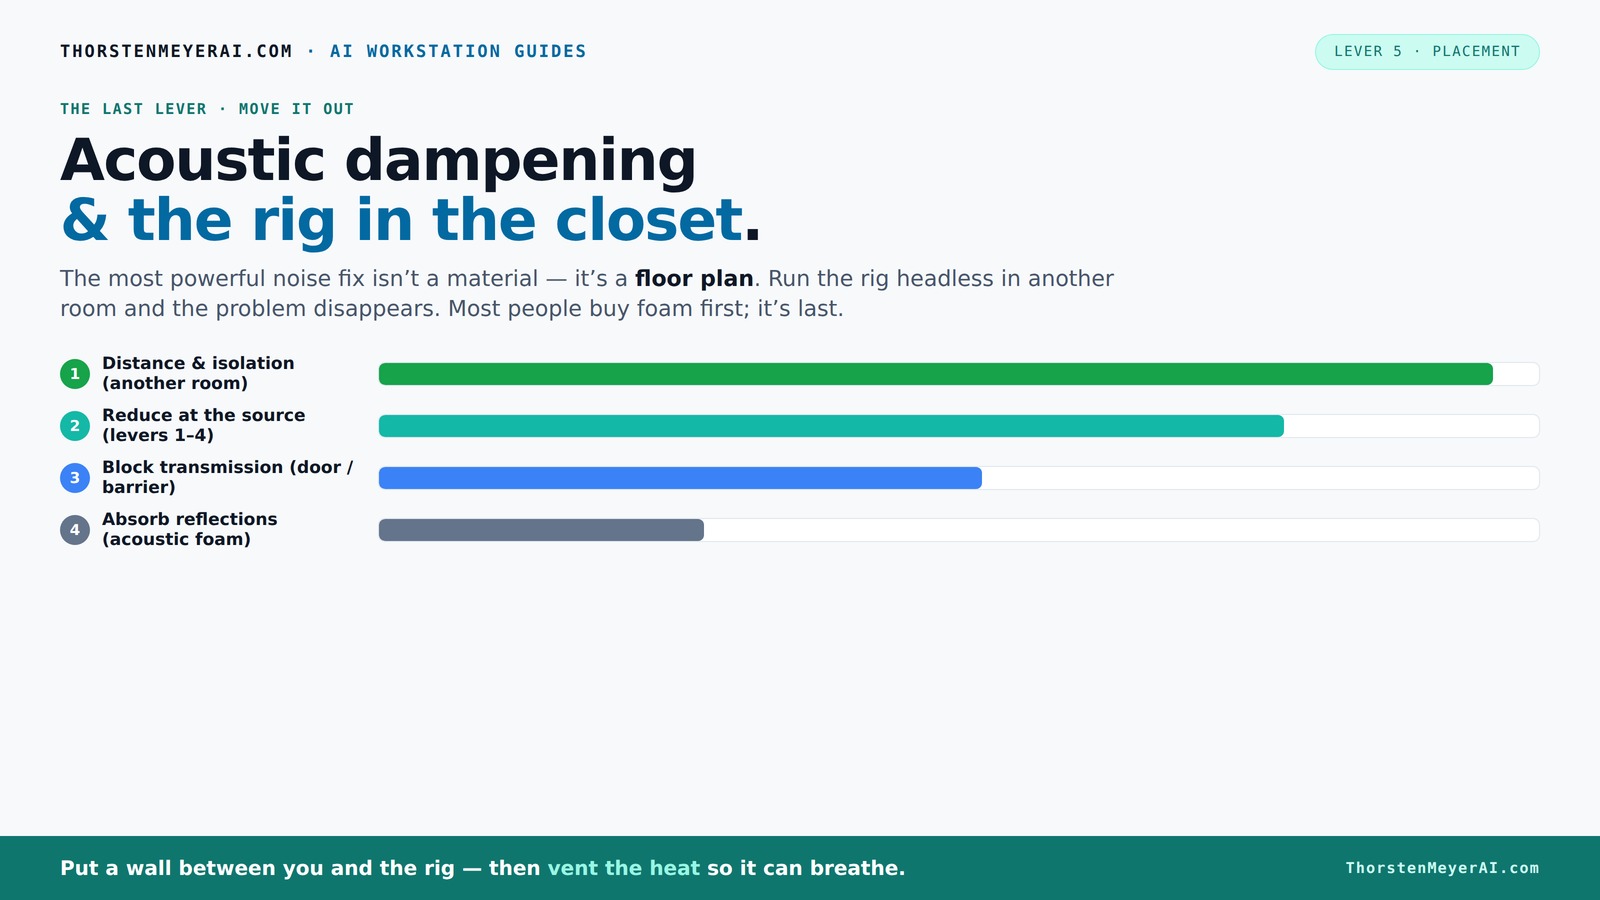
& the rig in the closet.
The most powerful noise fix isn’t a material — it’s a floor plan. A rig you can’t hear because it’s in another room beats any amount of foam. Tap the approaches in Part 1 to see what actually works.
(another room)
(levers 1–4)
(door / barrier)
(acoustic foam)
Contain the noise, not the heat
Key Takeaways
- Prioritize distance and isolation over foam — moving your rig to another room often beats all other treatments combined.
- Use strategic placement of acoustic panels behind the mic and at reflection points to dramatically improve sound quality.
- Seal gaps around the door and vents — leaks are the biggest source of sound escape in small spaces.
- Ventilate your closet properly with quiet fans or ducting — heat buildup kills both hardware and sound quality.
- Don’t rely on foam alone; mix soft materials like blankets and rugs with proper sealing and ventilation for a balanced setup.

Focusound 52 Pack Acoustic Foam Panels 1" x 12" x 12" Sound Proof Foam Panles Soundproofing Noise Cancelling Wedge Panels for Home Office Recoding Studio with 300PCS Double-Side Adhesive
Soundproofing - Acoustic foam panels triangular grooves structure for better noise absorption, helps to reduce and absorb unwanted...
As an affiliate, we earn on qualifying purchases.
As an affiliate, we earn on qualifying purchases.
Why Acoustic Dampening Isn’t the Same as Soundproofing (And Why It Matters)
Acoustic dampening and soundproofing are often confused, but they serve different purposes. Dampening reduces echoes and reflections inside a room, making recordings clearer and less reverberant. Soundproofing blocks sound from leaking out or coming in.
Inside a closet, dampening might mean hanging blankets or installing foam behind the mic. Soundproofing involves sealing gaps, adding mass to the door, or constructing a barrier. Think of dampening as controlling what’s inside your space, and soundproofing as keeping noise from escaping or entering.
Understanding this distinction is crucial because it influences your approach. Over-focusing on soundproofing in a small closet can lead to unnecessary expense and complexity, while neglecting dampening can result in a space that sounds echoey and muddy. Effective sound control is about balancing both: dampening the reflections to improve clarity, and sealing leaks to prevent noise from escaping or entering. The tradeoff is that perfect soundproofing is often impractical in small, budget setups, so prioritize dampening for sound quality and seal gaps for basic isolation.
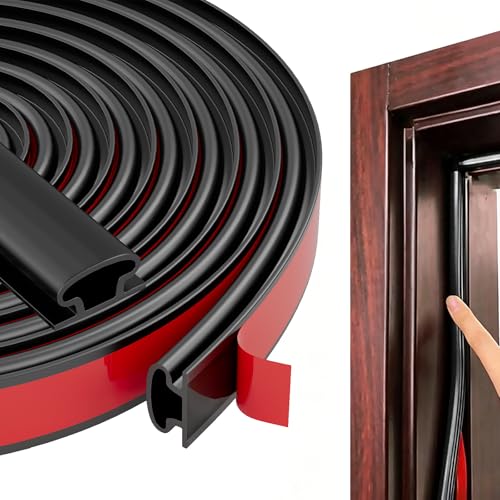
Black Rubber Weather Stripping Door Seal Strip, D Shape Door Weather Seal Strip, Self-Adhesive Soundproofing Frame Insulation Tape for Doors Frame/Window Seal,Blocks Cold Drafts Noise
【THICKENED SILICONE MATERIAL - COMPLETELY BARRIERING AIR AND NOISE】:The weather stripping is made of thickened TPE material with...
As an affiliate, we earn on qualifying purchases.
As an affiliate, we earn on qualifying purchases.
Best Microphone & Placement Tips for a Closet Setup
The right mic placement can make or break your closet recordings. Start by positioning your microphone about 6-12 inches from your mouth, slightly off-axis to reduce plosives. Use a pop filter and aim it toward the sound source, not the wall behind.
Pick a spot where reflections are minimized. Usually, this means avoiding the wall directly behind you. Instead, place the mic in a 'dead zone' — an area with fewer reflective surfaces.
Moving closer to your mic generally increases bass response and reduces room noise, but too close can cause proximity effect — an unnatural bass boost. Conversely, backing off too much introduces more room sound. Experiment with 6 versus 12 inches to find the sweet spot where your voice sounds full yet clear, with minimal echo. Remember, small adjustments can significantly impact clarity, so listen critically and adjust accordingly. The goal is to capture your voice directly while minimizing the room's influence, which is especially important in reflective small spaces.

VEVOR Portable Vocal Booth, 6.56 ft Height, Portable Recording Studio with Travel Bag, Mobile Tablet Stand, Thickened Soundproofing, Sound Isolation Booth for Echo-Free Vocals, Podcasts, Voiceovers
Say Goodbye to Echoes: Built with durable Oxford cloth and acoustic padding, this recording booth for the home...
As an affiliate, we earn on qualifying purchases.
As an affiliate, we earn on qualifying purchases.
Where to Place Acoustic Treatment for the Best Results
Acoustic dampening in a closet isn’t just about slapping foam everywhere. It’s about strategically targeting the main reflection points to control how sound bounces around the space. The primary reflection point is typically the wall directly behind your microphone—this is where most sound reflections originate and can cause muddiness.
Next, treat the side walls at the points where sound reflects toward your ears. To find these spots, use a mirror: position it along the wall while sitting in your recording position. Wherever you see your mic’s reflection in the mirror, place a panel there. This ensures you’re treating the most problematic reflection paths that can color your recordings.
Ceiling treatment is also critical, especially if reflections above cause a boxy or echoey sound. Use foam or panels on the ceiling to absorb upward reflections. Bass traps in corners are essential for controlling low-frequency build-up, which can make your recordings sound boomy or muddy. Proper placement of these traps in corners where low frequencies tend to gather helps create a balanced sound. Lastly, sealing gaps around the door with weatherstripping or acoustic sealant prevents sound leaks that can ruin your isolation efforts. The key is understanding that targeted placement maximizes effectiveness while minimizing unnecessary clutter and expense.

4 Pack Sound Isolation Pads 2 x 2 x 7/8 inches Damping Mats with Textured Rubber & EVA Core Layer, Designed for Turntables to Reduce Vibration and Skipping While Enhancing Musical Clarity
【It Fits Most Devices】These anti vibration pads fit under most Hi-Fi systems, including the popular Technics turntable. Perfect...
As an affiliate, we earn on qualifying purchases.
As an affiliate, we earn on qualifying purchases.
Comparison Table: Foam, Blankets, Panels, & Bass Traps — Which Works Best?
| Material | Best For | Pros | Cons |
|---|---|---|---|
| Acoustic Foam | High-frequency reflections | Lightweight, inexpensive, easy to install | Doesn't block low frequencies or sound leaks; limited in controlling bass and echoes |
| Moving Blankets | General absorption, sealing gaps | Cheap, versatile, effective for soft absorption | Bulky, less precise, can be less attractive visually |
| Acoustic Panels | Focused reflection control | More dense, higher absorption efficiency, better for critical listening | Costlier, requires careful placement to maximize benefits |
| Bass Traps | Low-end buildup | Reduces muddiness, improves clarity and overall sound balance | Requires proper placement in corners and thicker panels for best effect |
How to Properly Seal Your Closet Door and Gaps
The closet door is often the weakest link in sound isolation. To effectively cut sound leaks, use weatherstripping around the door frame — this creates a tight seal that prevents sound from escaping. For larger gaps or cracks, add acoustic sealant or door sweeps, which block sound paths without adding much bulk. Think of these as the last line of defense against noise leaks.
For a quick and inexpensive fix, hang a heavy blanket or moving pad over the door. This simple step reduces sound escape and echoes inside, but it’s most effective when combined with sealing around the edges. For even better results, consider attaching acoustic panels directly to the door surface to absorb residual reflections and prevent sound from bouncing back out.
Proper sealing can dramatically improve your sound isolation. For more tips, visit Acoustic Dampening, Placement, and the “Rig in the Closet” Setup.ally improve your isolation—by over 50%—which is especially important in small, shared spaces. It’s a small investment that yields significant improvements, making your recordings clearer and more professional.
Managing Heat & Ventilation in a Closet Rig
Placing a powerful rig in a sealed closet traps heat, which can lead to hardware overheating and increased noise from fans. Without proper ventilation, your system may throttle performance or even suffer damage. The key is to implement effective airflow solutions that keep your equipment cool without introducing noise.
Passive vents can be installed to allow airflow, but the most reliable method is a quiet exhaust fan. Choose a fan designed for low noise levels and install it with ducting that directs hot air outside the closet. For example, a 120mm exhaust fan with a thermostat can maintain a stable temperature around 70°F, ensuring your hardware runs smoothly without overheating. This setup also prevents heat from building up, which can cause thermal noise in recordings.
Regularly monitor your system’s temperature to avoid thermal stress. If heat remains an issue, consider liquid cooling solutions or adding more ventilation points. Proper heat and airflow management are essential for long-term reliability and maintaining a quiet environment for both hardware and recordings.
Common Mistakes and How to Avoid Them
Many people assume foam alone will solve their noise problems. It won’t. Foam helps with high-frequency reflections, but for effective sound isolation, you need to seal gaps, treat reflection points, and manage leaks. Relying solely on foam can give a false sense of security, leaving low-frequency leaks and echoes unaddressed, which diminishes overall sound quality.
Another common mistake is sealing a closet completely without providing ventilation. Over-sealing can trap heat, leading to hardware overheating, increased fan noise, and potential damage. Always balance sealing with adequate airflow to prevent these issues.
Ignoring the door and gaps is another pitfall. Leaks at these points are often the biggest culprits in sound escape. Properly sealing and adding soft materials like blankets or panels over the door can drastically reduce sound leaks. Additionally, cluttered or hard surfaces reflect sound, causing echo and muddiness. Organize your space with soft furnishings—rugs, curtains, or soft furniture—to absorb sound and improve acoustic quality.
Finally, neglecting mic placement and reflection points can compromise your sound quality before any treatment is applied. Position your mic carefully and treat the most reflective surfaces to maximize your setup’s effectiveness.
Frequently Asked Questions
Is acoustic foam enough for a closet booth?
Not by itself. Foam helps with high-frequency reflections, but for effective sound isolation, you need sealing gaps, treating reflection points, and managing leaks. Foam alone won’t block noise from escaping or entering.Where should I put panels or blankets for the best results?
Place panels behind your mic, at reflection points on side walls, and on the ceiling. Use blankets to cover gaps or the door, and add bass traps in corners if low-end muddiness occurs.Do I need bass traps in a small closet?
Yes, especially if you notice boomy low frequencies or muddiness. Bass traps in corners help tame low-end buildup, resulting in clearer recordings.How thick should my acoustic treatment be?
2-inch panels work well for small closets, while thicker panels (3-4 inches) absorb lower frequencies better. Thicker materials are more effective for controlling bass and deep reflections.How do I stop sound from leaking through the closet door?
Seal gaps with weatherstripping, add acoustic sealant around the frame, and hang blankets or moving pads over the door. Proper sealing can cut leaks by over 50%, significantly improving your isolation.Conclusion
Your best audio quality in a tiny closet comes from smart placement, targeted dampening, and a focus on heat management. It’s not just about adding foam — it’s about controlling where sound goes and how heat escapes.
Imagine turning that cramped closet into a quiet, professional-sounding booth that feels more like a secret weapon than a makeshift space. The right balance of treatment, sealing, and ventilation makes all the difference. Your perfect mini-studio is within reach — just plan it wisely, and don’t forget to breathe life into your space, not heat.